


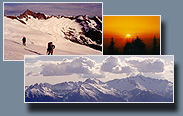

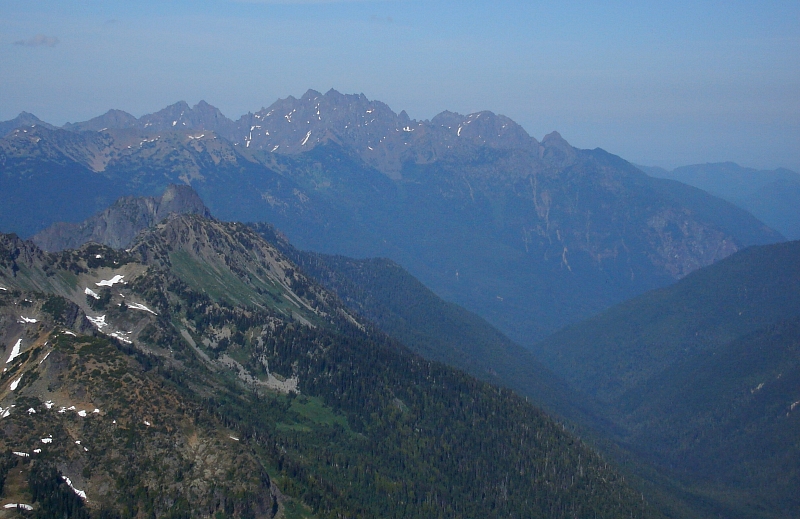
Mount Anderson - East Ridge of West Peak (and Mount Anderson proper), July 2009
 as seen from Mount Deception.")
I credit long-time climbing partner Eric H. for initially drawing my attention to Mount Anderson, a large mountain massif hidden deep within the Olympic Mountains. To be honest, it seemed like an unremarkable, out-of-the-way pile representative of most of the peaks in the range. One could say that I wasn't exactly enthusiastic about Anderson. But, alas I promised Eric I'd climb it with him someday if he would accompany me on the West Arete of Mount Constance - a peak he had already visited two times prior. In my ever-expanding quest to visit unclimbed (by me) peaks in unfamiliar (to me) pockets of our local mountain ranges, Anderson's increase in priority on my to-do list was virtually assured. By the summer of 2009 it was finally getting to be time to pull the trigger on the trip. Despite the unfortunate fact that Eric wouldn't be able to join us, Paul K's timely suggestion to climb the peak over the July 4th weekend was music to my ears. *All text from this point on (excluding image captions) by Paul K. and based on his SummitPost page - East Ridge from Flypaper Pass.
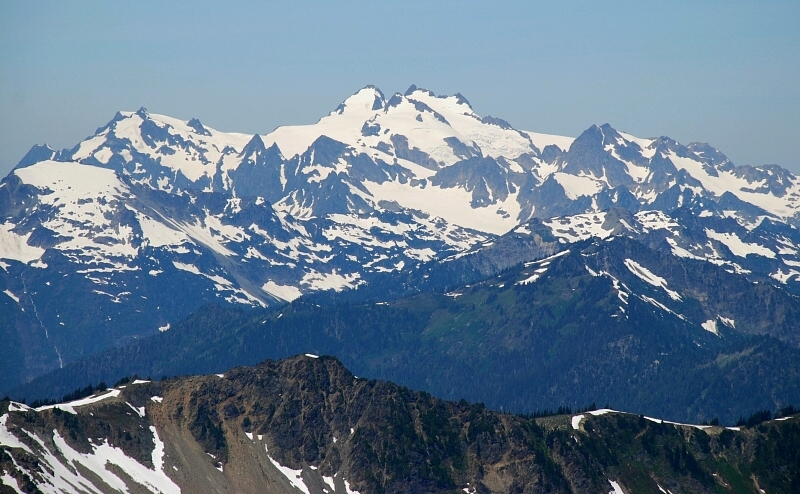
Described in this report is the standard route (the only route mentioned in the Olympics guidebook). But whereas the guidebook is sparse (as always) with details, I will fill you in with some. What you need to be prepared for when climbing this peak is loose rock and route finding, particularly in poor (fogged-in) weather. The route is circuitous depending on one's start point. For probability's sake, I'll start the route description from Anderson Pass a couple of miles SSE of the summit. The added attraction of this route is it will take you past the hydrographic apex of the Olympic Range. You can stand at the triple divide point, one of very few in the world. A cadenting sweat bead on your brow could drop into the basin to the south and drain away toward the Pacific Ocean via the Quinault River. Or the bead could drop to the northwest down the north face of the mountain and find its way to the Strait of Juan de Fuca by way of Hayes Creek thence the Elwha River. Or the bead could drop eastward onto the Eel Glacier and slide away to Silt Creek thence the Dosewallips River to the Puget Sound (Hood Canal). Or if you're not careful, you yourself could fall into one of the above, with that cadenting tear replaced by cadenting blood. But enough of the macabre...
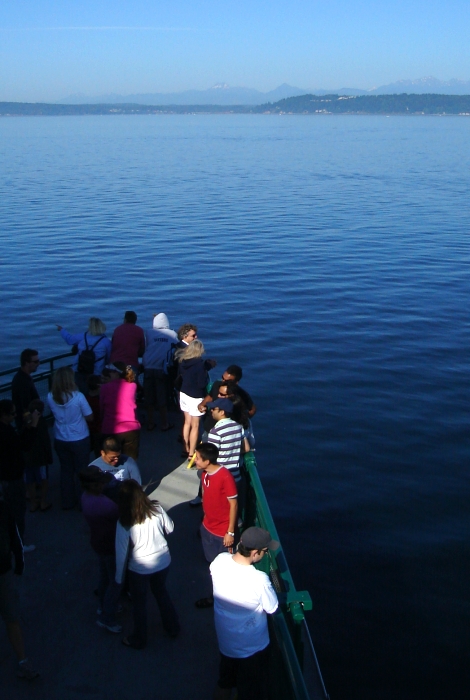
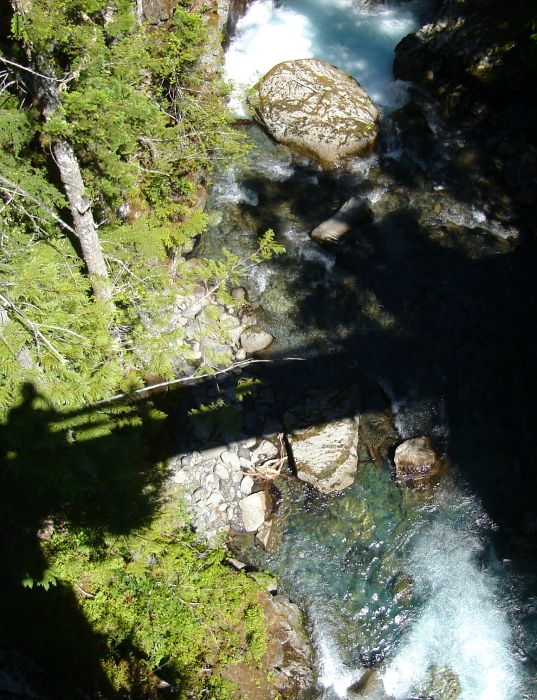
Like most trips to the Olympics, this one starts with a ferry crossing. We caught the 7:10am Edmonds-Kingston sailing, and arrived at the Dosewallips River washout after about an hour of driving. From the current start of the trailhead immediately east of the washout, the trail switchbacks steeply up the embankment at right. When I was there last on the Constance trip, I recall having to drop down to the river's edge and pushing my bike along a bit of a path towards the road continuation on the opposite end of the washout. Doing this no longer appears to be possible. We biked the 5 or so miles to the ranger station without further difficulties, stopping only to re-hydrate and push our bikes up an impossibly steep section of road. With the bikes stashed behind one of the ranger station buildings, we proceeded on a warm but pleasant 9-mile hike deep into the Olympic forest. We crossed a couple of large footbridges, one of which spanned a narrow gorge very reminiscent of the one from the approach to Mount Olympus. Leaving our buggy camp at the La Crosse Pass Trail junction at the far end of Honeymoon Meadows around 6:30 the next morning, we continued our trek up towards Anderson Pass. As forest slowly gave way to picturesque alpine meadows, the first unobstructed views of nearby peaks were finally ours to behold. After so much mind-numbing valley hiking, even Mount La Crosse was beginning to look like an attractive peak to climb. Best to keep moving...
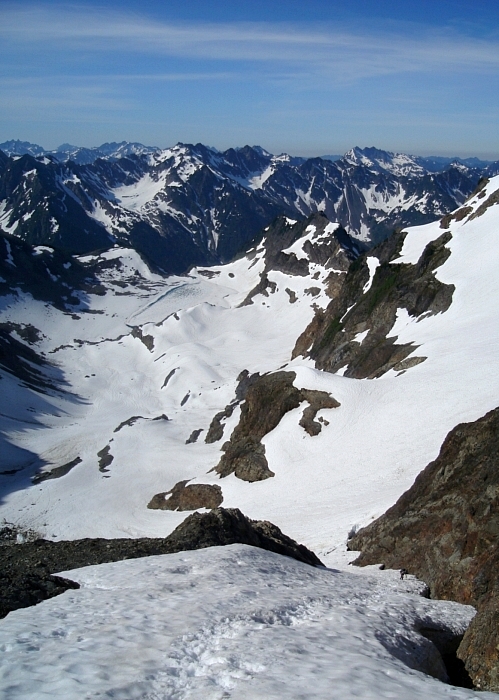
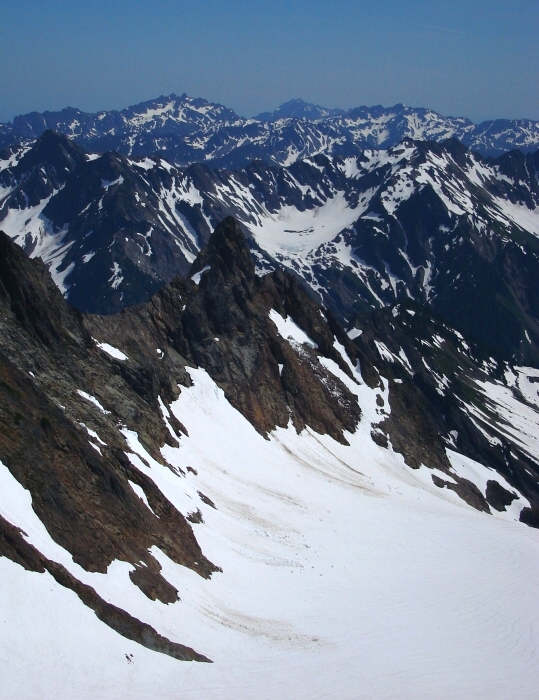
From Anderson Pass (4465 ft), take the switchbacking way trail up to the Anderson Glacier. The way trail is about a mile long and ends long before the glacier just above a small tarn at 5100 ft southeast of sizable Moraine Lake. Cross the saddle north of the tarn and descend 100 ft to the sometimes bouldery declivity east of the lake. Continue onto the flat snow of the glacier beyond. This part of the Anderson Glacier isn't much to shake a walking stick at. The slope steepens gradually. You're aiming for 6600-ft Flypaper Pass, the obvious low-point notch between Mt. Anderson on the east and 7033-ft "Echo Rock" on the west. There is a steep snow finger allowing access to the pass. In late season this finger could be melted out thus exposing bare rock scrambling that could make the finger harder to climb. The steep snow finger is about 300 vertical feet high and lies back at an angle of about 30 degrees. Crampons are recommended-because it is likely you'll be climbing it in the morning when the snow is firm and possibly also late in the day when the sun has dipped behind Echo Rock thereby shading the finger. After the finger the last bit to the pass lays back.
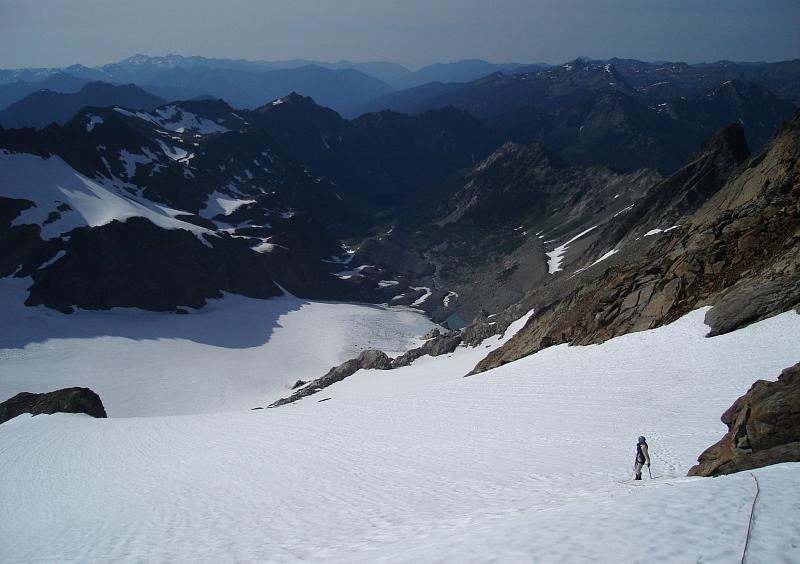
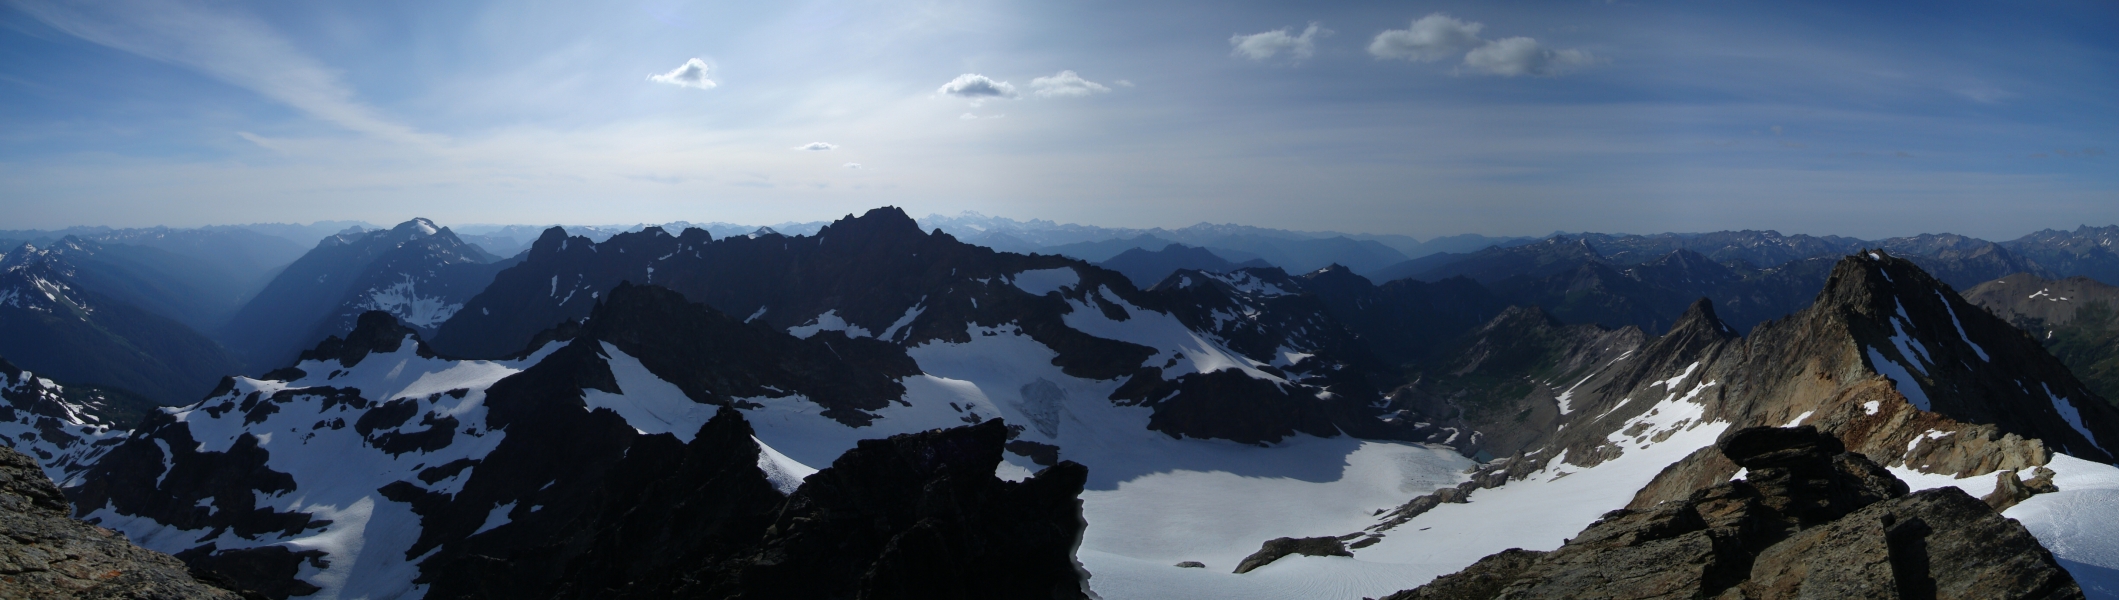
Stick yourself to that flypaper and take a break and rope up for the crossing of Eel Glacier (should you believe it necessary). Allow 2 hours to get from Anderson Pass to Flypaper Pass (2300 ft of gain). It appears one could camp at Flypaper Pass in a snow swale on the north side. Water is nearby (probably). Descend onto the Eel Glacier. A bergschrund extends across the middle of that descent line and forces an end-around to either side. We went around the east side mostly because other tracks went that way. There is a short 50-ft section of steep snow above the 'schrund but it is otherwise a non-issue except maybe in late-season. You are aiming for a break in a minor cliff band coming off the northeast side of West Peak. This minor cliff band is NOT the north ridge but a lower band separating two upper snowfields from the glacier. The break in the cliff band is at 6200-6300 ft. Descend the Eel obliquely left (NNE) to cross under a large rock outcrop that separates two accumulation zones of the glacier. The low-point of the traversing descent is ~6160 ft (i.e., about 500 vertical feet below Flypaper Pass). We encountered no crevasses and maybe only one crack in the snow in early July.
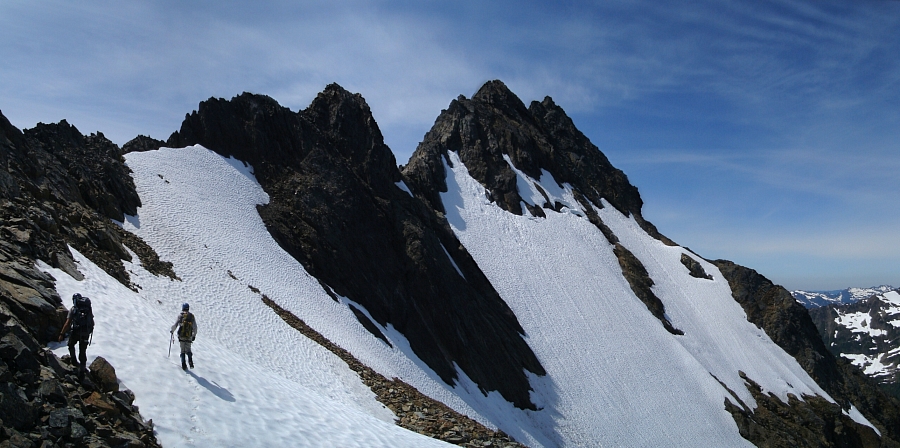
Pass through the cliff band on snow ramps or bare ground. Good water sources can be found through here. Turn back left (SW) on the lower of the upper snowfields and climb up through a steeper snow gap to the smaller upper snowfield. The U-shaped notch above the top-left corner of this upper snowfield is where you are heading. Angle up the snowfield until it ends then scramble Class 3 rock (Class 3+ near the top) to the 7040-ft notch. Allow 1 to 1.5 hours to get from Flypaper Pass to North Notch (-500 ft of loss then 900 ft of gain). The other (west) side of the notch has an easy walk off. Turn south and bypass the first few minor crags on the crest on their west side. Or, if you want to visit the aforementioned triple divide point, run this crest (Class 3) or scramble up to it wherever that triple divide point resides (it could require you to use your imagination).
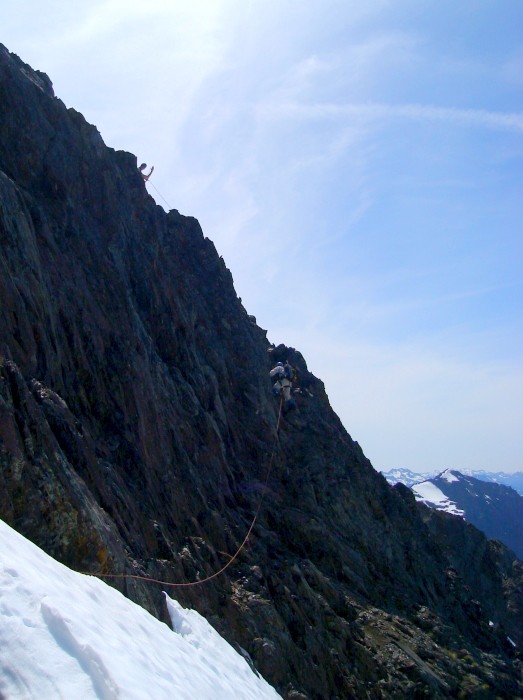
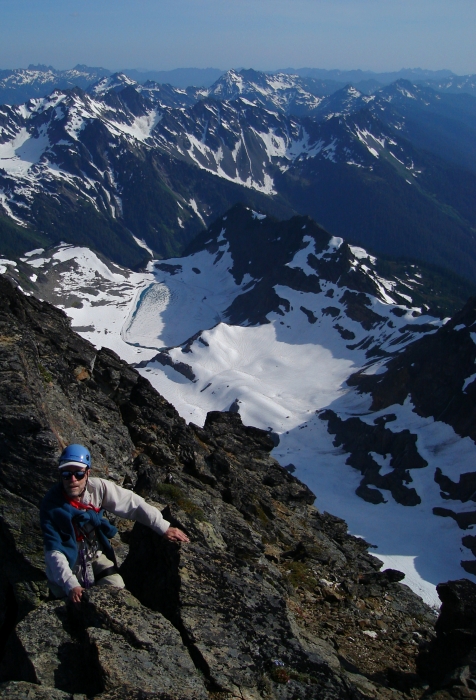
The ridge turns right (southwestward). The first real section of ridge begins here and is a serrated fin lasting about 100 horizontal feet. Getting immediately onto this crest is probably Class 5 so instead walk the top edge of a snow moat (if there is snow) under the crest on its north side until the moat begins going downhill along the wall. At this point one can either climb directly up a 20-ft Class 4 chimney or traverse horizontally for 50 feet on Class 4 rock (some looseness) to a very minor rib allowing access up to the crest on the far side of the fin. There is potential for rope drag here. Once on the crest you will be staying on the crest (or very close to it) all the way to the summit.
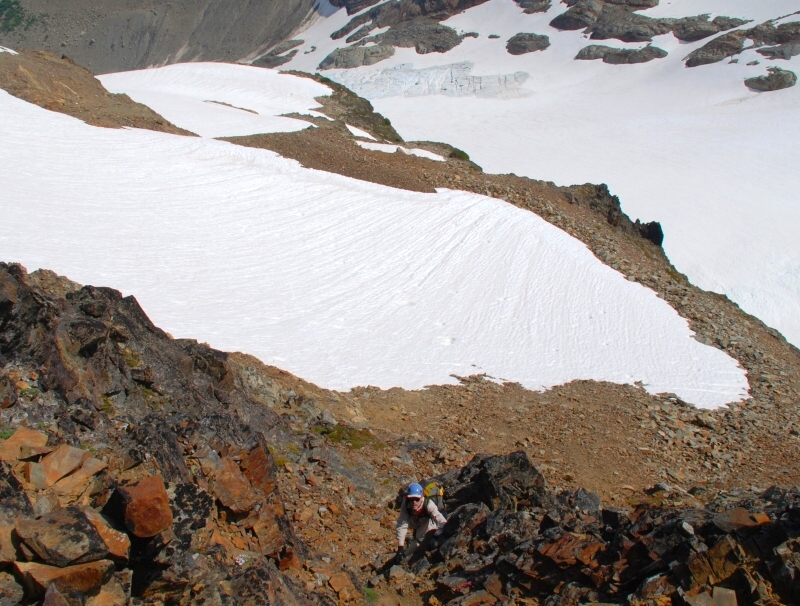
The first ridge tower after the serrated fin contains the loosest rock of the entire ridge. Climb to the top of the tower, testing every hold as you go. Class 3 but loose so it feels like Class 4. Carefully downclimb the first tower into the notch on the other side. The rock is still mighty loose. Remember to place protection for your partner(s) to avoid long pendulum falls. Strangely, the rock after the notch is really solid and fun to scramble on. But it's short-lived. This fun rock (it's light gray in color and is probably metamorphosed basalt) rises slightly to the next tower (the false summit). At the end of the gray rock it is necessary to bump up a 6-ft-high rock face onto heather and sand benches. The rock bump goes at low Class 5 right off the deck for one fun move.
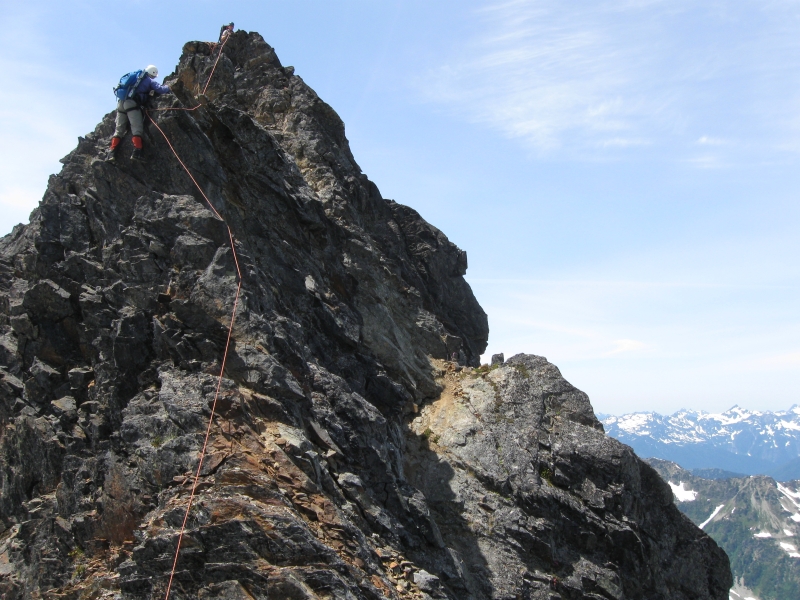
Climb up the tower slightly left of the crest and cross through an indentation to get to the top. You can now see the true summit 100 yards away. Now downclimb the other side of the false summit on ball bearing strewn slabs and benches to the final notch. At this point you can continue on the ridge to get to the top (one Class 5 block to climb past) or bypass the final ridge by way of a gully crease on the north side. The Class 5 block was rated as 5.4 with nice exposure. But it's only one or two moves. The north side gully is Class 4 and nowhere near as aesthetic. To get to it, downclimb from the notch about 15 feet then cross left (west) under the ridge on Class 3/4 to get to the gully. Rather than endure the unpleasantries of the loose dirt and sand in the gully proper, finish on the minor Class 4 face to its right. There is a rap sling at the top of this gully. Turn left and scramble back up to the crest a few feet away. You are now about 15 feet beyond the Class 5 block.
The last 20 feet to the summit are on more of the same. Class 3 but loose. There are no anchors at the summit. It's just a jumble of small-to-medium sized boulders. Three people barely fit on the summit. Allow for 2 hours on the ridge. It could be done quicker, especially if there are just two of you. We got to the summit 7 hours after leaving our camp near Honeymoon Meadows. No register was found. After a round of congratulatory handshakes and the obligatory summit photo snapshots, it was time to head back. We reversed our route back to the Eel Glacier, and slogged up to the summit ridge of Mount Anderson. I found the views from this lesser summit to be somewhat better than those from the West Peak. The combination of position and late afternoon light (it was 6pm or so by then) probably contributed to this sentiment. We reluctantly left the summit and staggered in to camp after 8pm-about 13 hours round-trip.
Paul and I celebrated our climb by each imbibing a most satisfying can of Dale's Pale Ale while Martin looked on with envy. With the beer finished, we proceeded to polish off most of the remaining whiskey (I heard later the remaining ounce or so of whiskey was used to experiment on a pesky mountain goat at camp: would the goat attempt to lick the wet ground where the whiskey was poured?). I slept well that night, though not as good as the previous night where I apparently konked-out hard from exhaustion, leaving an arm exposed outside the sleeping bag for the mosquitoes to drink from at their leisure. I parted ways with my comrades early the next morning-the two were taking an additional day to tag Mount Elk Lick-and began the long, lonely trek back to the ranger station.
Everything about this trip went off without a hitch...well, almost. A special thanks to Paul for taking the bull by the horns and leading the way along the easier-than-it-looks ridge on West Peak. Second only to Mount Olympus for me, I found the scenery in the area to be some of the best the Olympics have to offer and yes, Eric was right, a trip to Mount Anderson is indeed well worth the three-day investment. Now, if only I didn't have that annoying 2-hour ferry wait on the drive home to tarnish the experience!
Click here to view photos.
![]()


