


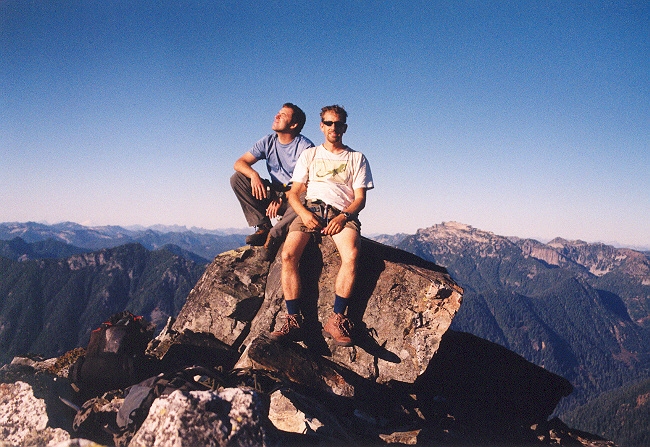
"The Improbable Enchainment" - West Ridge of Lundin Peak via Guye Peak's Improbable Traverse, October 2004
.")
I was feeling guilty for not having made the most of the short spell of great Indian Summer weather we were having this Fall. I had Monday free and put a call out to Paul to see if there was anything of interest the both of us could climb together. Due to the shorter days, mounting "sleep pressure" thanks to a long summer of climbing and alpine starts, and logistical considerations (Paul would be driving over from Leavenworth), we agreed to limit our scope to peaks near the I90 or HWY2 corridors. I was interested in doing Guye Peak's Improbable Traverse but Paul had just done it recently with Tony Tsuboi. His appetite was lacking for something as moldy as a repeat of Guye Peak. Paul had always wanted to do Lundin Peak's West Ridge having failed to do it twice before. As a compromise, we agreed to do both. That's right: Lundin's West Ridge by way of the hard route up and over Guye's West Face. We would call our little adventure "The Improbable Enchainment." Paul could then lead the improbable traverse pitch this time as he had not done so with Tony. There was just enough novelty in combining two short day trips into one last end-of-season hurrah to keep me entertained...if not a bit exhilarated.
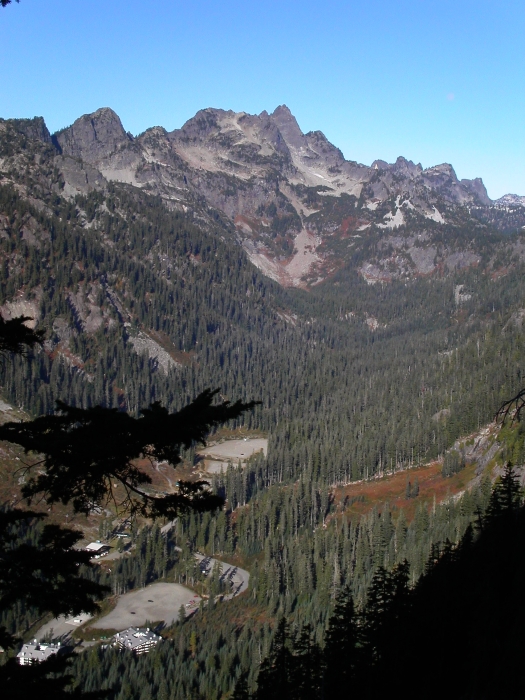
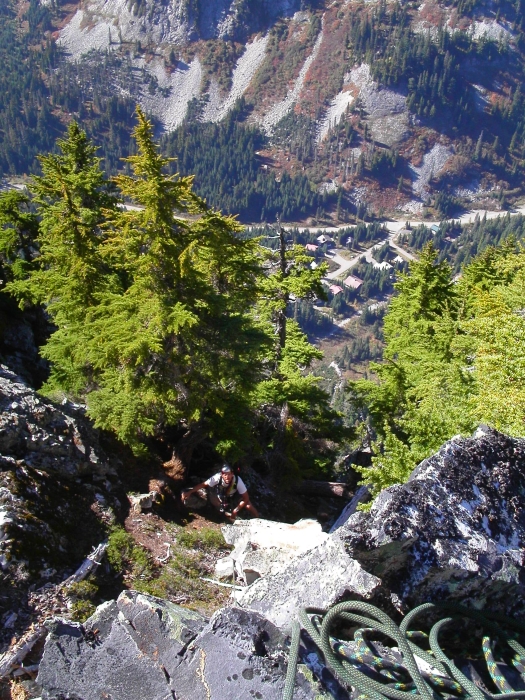
I found Paul diligently brushing his teeth when I rendezvoused with him at the PCT trailhead parking area. We transferred gear into my car and continued down the Alpental Road to the chalet street turnoff. We drove up the chalet hill for about four blocks to where the main street turns sharply right. A large gravel area on the corner here offers ample parking. There is a tall "No Parking, Violators Towed" sign at one end of the gravel area but it is most likely only for winter. I parked there last time all day and the car was there when we got back, but park at your own risk. Just to play it safe, I chatted with a few "locals" that congregated at one end of the pullout for what seemed like a daily ritual of coffee and gossip. The consensus was that I probably wouldn't get towed - at least these fellows weren't going to call the tow truck on me, though they did point out that "...they pulled a stiff from there last year", referring to the large talus fan below Guye's huge West Face. Ahh...just what I needed to hear. Hey, thanks guys!
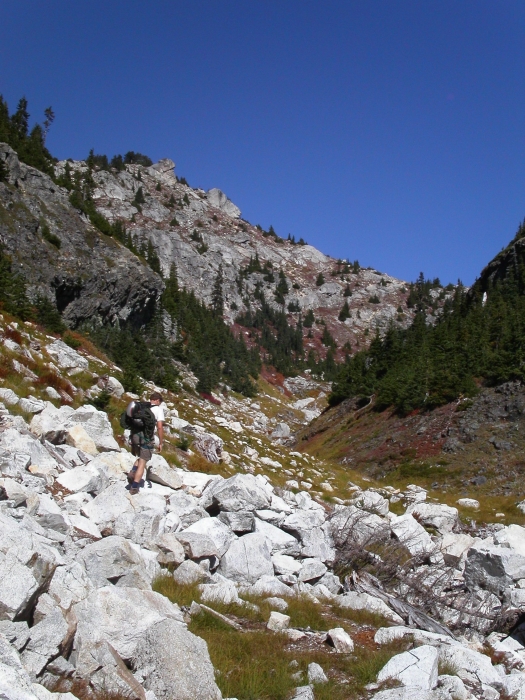
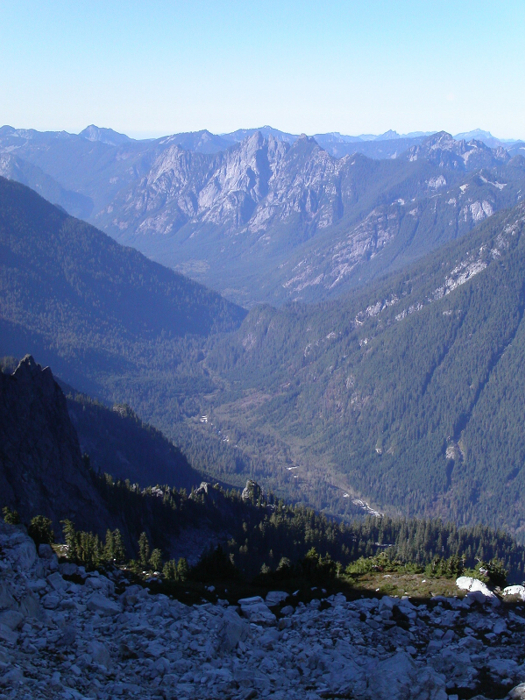
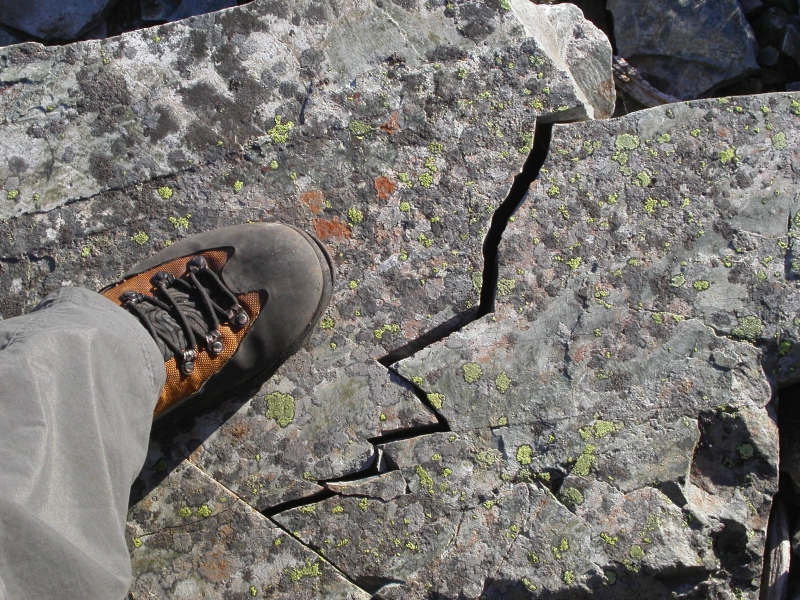
From the far end of the gravel area on the chalet street (c. 3,080 ft), we descended a few feet on trail through alder to get to the talus fan. We then hiked directly up the talus, which gets looser near the top. We climbed up the left side because it looked more solid than the right, then headed for the tip of the talus where it necks down into the prominent gully at center-face. Eventually a rough bootpath appeared in the upper talus that led into the left side of the gully. The rock starts out as slabby Class 3 but soon tips up to unprotectable Class 4 (c. 4,200 ft?).
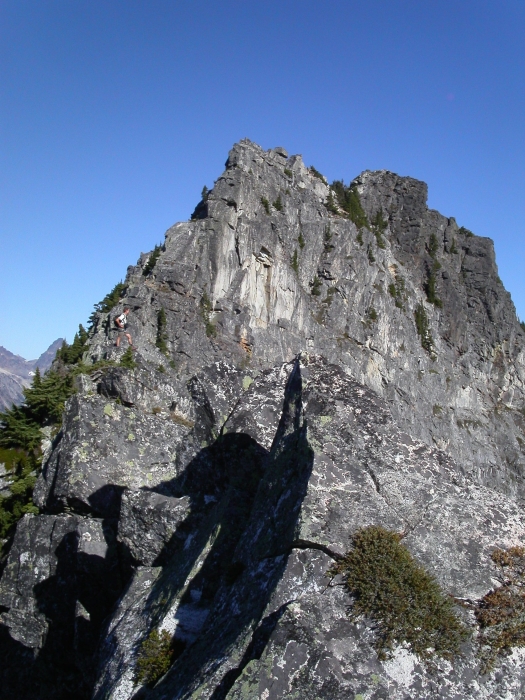
There are two ways to get to Lunch Ledge, a kitchen-sized ledge at the same elevation as the Improbable Traverse pitch. The ledge has a large belay anchor on it. The first way to Lunch Ledge is the way described in detail here. It is the easier of the two. The second way offers steeper climbing and is more direct. It is the route described in Beckey's CAG. As mentioned earlier, the talus gully at the base of the face tips up to Class 4 terrain. The Class 4 is a 50-degree slope (darker, reddish rock) cut by two or three minor gullies. We basically picked a way up the slope, going right first then making a short step to the left and then up a rib. Fortunately the holds were good, though loose rock does lurk. Protection is almost non-existent, meaning a belay would be a waste of time.
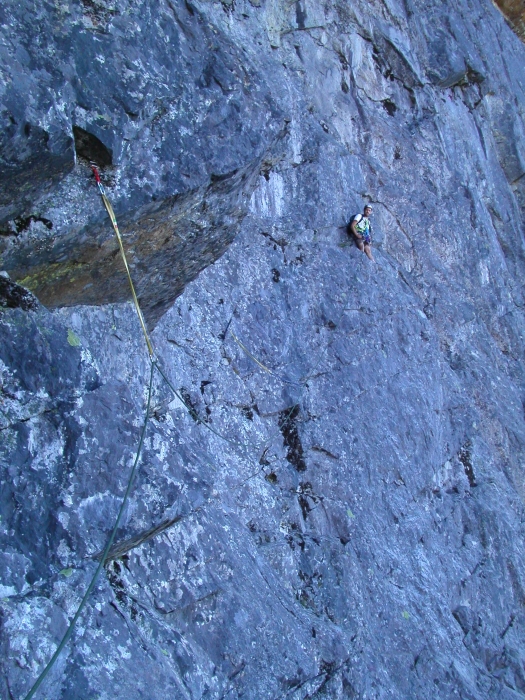
Once above the Class 4, we turned left. Two ramps appeared: an upper and a lower both trending up and left. Though it seems possible to gain the upper ramp (Class 4 down low?), a proven route is to take the lower ramp (Class 3) to its end at some trees then transition to the upper ramp. The transition is Class 4/low 5th for about 15 feet (good but somewhat loose). Once on the upper ramp we again turned left and climbed to its end. From the top end of the upper ramp a short level spine leads to trees. We walked into the trees and forced our way through them. A few chimpanzee moves were necessary to gain the boulders above and right of the trees. There was a wide slot between the wall of the face and one of these boulders. In this slot is a nice flake that can be slung for a belay. The slot goes down a few feet. At its low point beyond a bulge a terraced ledge continues off (south) on the wall. This is the first pitch. It is about 70 feet long.
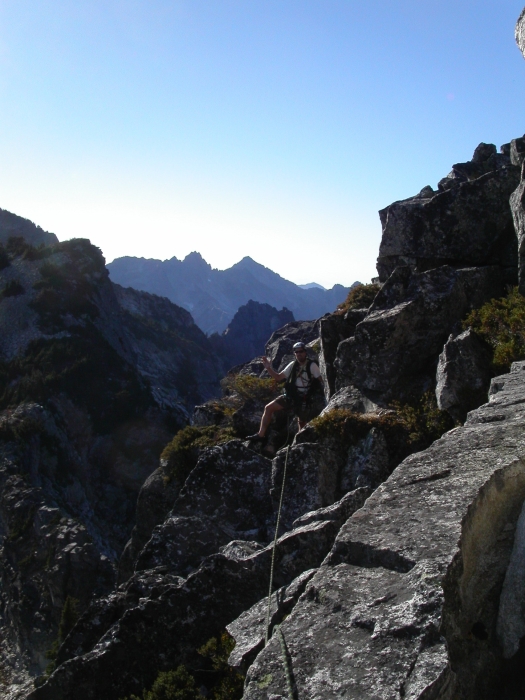
Climb down the slot and around the bulge (Class 4) then along the terraced ledge to where it goes left around a corner. The ledge is mostly Class 4 but a few low-Class 5 moves are necessary. Protection is adequate (cracks in the beginning; a minor horn near the corner). Lunch Ledge is reached once around the corner. Anchor into the belay station there and bring up your second. From Lunch Ledge, we climbed up and over a pedestal just before an overhang. A down-facing crack above the pedestal takes smaller cams well. Scoot under the overhang (5.6, but very airy) to its end to a more agreeable ledge slightly lower down. Face-climb 5.4 up left, then right to a ledge twenty feet up. A diagonal crack halfway up this face slots a mid-size nut very well. Attach a double-runner to this piece--or a triple--to mitigate rope-drag.
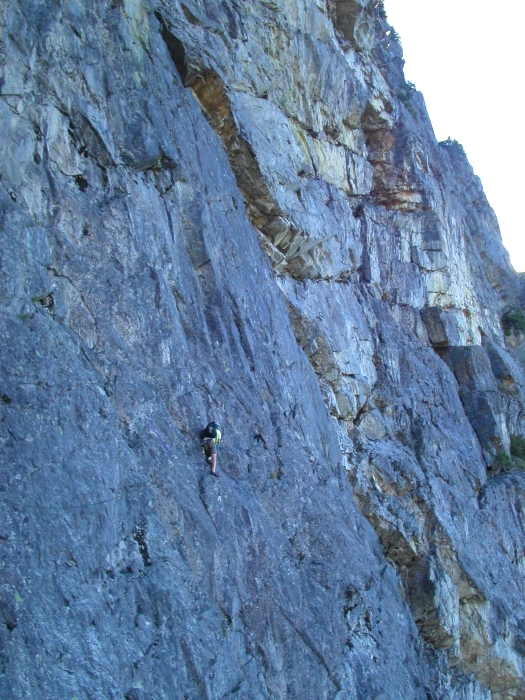
From the ledge, continue rightward into a minor depression. Across the depression locate a knifeblade piton. Reach out and clip this piton with a double-runner before doing the move to it, which is the first of the two 5.7 crux moves for the climb (very exposed!). With nothing for hands, balance steps past the piton six feet to another piton (this one's a little looser). Clip the piton with a double runner (though a fall will be longer on a double). The move beyond this second piton is sketchy but solid and calls for delicate edging along small ledges below a platform. Note: To reduce the pendulum factor should a fall occur, the follower should do the move past the second piton first then remove the protection behind him.
Once past the crux, climb up a few feet to a small ledge trending slightly downhill to the right (easy 5th Class). Place protection where possible (more = less pendulum factor for follower). The farther out from Lunch Ledge the less mandatory it is to use double runners. The ledge eventually comes to a short downclimb. To make things safer for the second, consider placing a piece as low down on the beginning of the downclimb as possible. There is a crack that will take a small-to-mid sized cam. Without this low piece, a follower fall will be a long one because there will be nothing above and behind him to protect him. Descend 15 feet (5.5 downclimb but exposed) to another ledge. There is a loose horn-like rock in the center-bottom of the downclimb that is okay for stepping on but I don't know if I'd pull too hard straight out on it. Looking down and left (when facing in to the wall), another piton in a small recess is visible, though it may not be of much use. Perhaps it is for those coming across along the lower ledge (the one down and left of the downclimb part).
Continue right on easier but looser rock to the high-angle ramp. There is no good protection on the ramp or its far wall. Instead, look for a small horn where the ledge meets the ramp. About two feet left of the horn is a very thin vertical crack that slots the tiny #3 nut well. There are some other cracks available but the rocks that comprise them are loose. Climb up the ramp to the trees at its top. The beginning of the ramp is enjoyable Class 4 slab. The middle part is irritating Class 3 rubble. The end near the trees is sketchier (with rock shoes) duff and moss-covered slab. Protection points are available, particularly on the right wall. The climbing is easy so it shouldn't be necessary to place a lot of protection. A 60m rope will not quite reach all the way to the trees, thus necessitating about 50 feet of simul-climbing.
Once in the trees atop the high-angle ramp we put our boots back on. We walked in coils for 70 yards up through trees to where they end (bootpath), scrambled up and around to the left or right of a rock promontory, then turned sharply back to the left on another ramp. This ramp leads back into trees. Walking up and left through the trees, we rounded a corner and arced around the next depression past a deep chimney/gully. The summit is up and left of this gully, not up and right. Continue around to the far left end of the depression to a series of trees. This is the start of the last pitch to the top.
We began to the left in an awkward right-leaning crack (5.4). Climb rightward to a white snag. Continue up and right to the makings of a gully/chimney in a depression. Climb up the gully (piton located somewhere here) on Class 4/5 rock then continue upward to trees. A 60m rope will run out a little beyond these trees a few dozen feet from the summit (simul-climb recommended). This pitch is actually pretty enjoyable in spots. The holds are so nice at times it's as if they were chiseled right out of the rock. Later, the pitch gets dirty. Not so great. The last few feet to the summit (south summit) is a cake-walk. Time = 4-5 hours on face.
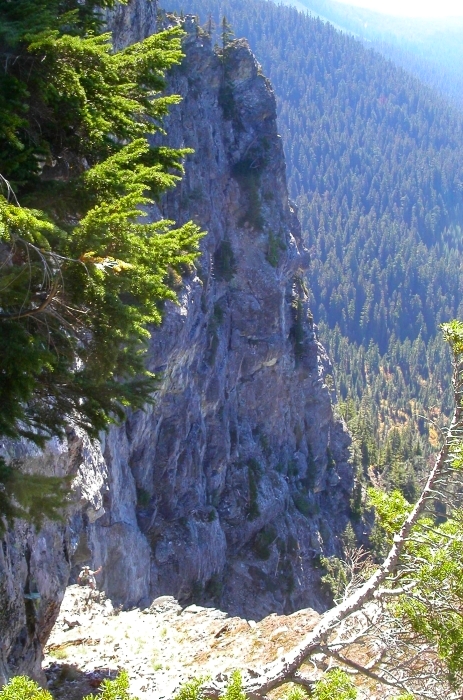
To descend, we took the trail from the south summit to its end below the middle summit. We scrambled up and over the middle summit to the next notch. A short Class 5 pitch can be done up and over the final north summit. Instead, we descended rightward down the gully and up the gully on the other side. The descent into the gully is over mossy slab (Class 3/4). As such, a lot of parties rappel it. There are two different rappel anchors--one on a tree at the notch, another slightly below it. The brush-choked gully on the other side has a bootpath in it. Once atop that gully it is clear sailing on trail. Well, the trail is steep and rooted at times but good-to-go all the way to the 4,600-ft saddle between Guye and Snoqualmie Mountain.
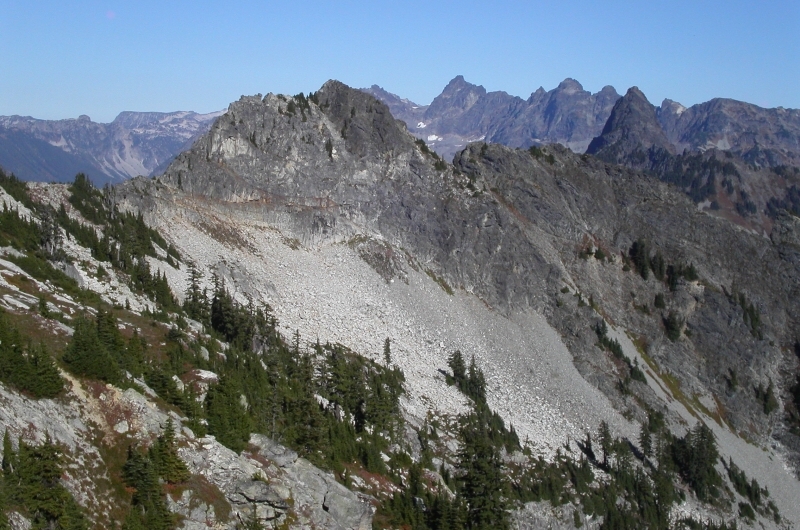
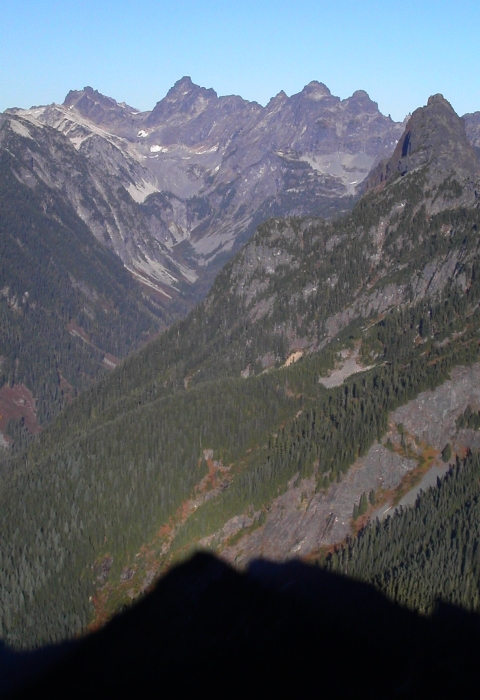
From the saddle, we continued up on trail taking right forks where possible before a short descent to a sandy draw. The draw arcs around to the right (around Cave Ridge). A faint boot path may be recognizable in the draw (left of the stream). Water is available year round in the stream. In less than half-a-mile the south spur of Snoqualmie's East Snow Dome is reached. Continue up the spur nearly all the way to the Snow Dome (6,160+ ft), leaving it where feasible to contour northeast on or just below the Snoqualmie-Lundin Ridge. Descend slightly to where the West Ridge sharpens to a blocky crest. Continue along the crest (Class 3 with some exposure but not difficult) until it finally steepens.
From the small notch between flat spine and steeper ridge, begin by first climbing the ledge (mostly Class 4 but with a few low 5th moves) for about 120 feet. By climbing directly on the crest, we eventually found ourselves on a small, slabby tower that seemed virtually impossible to down-climb on its opposite side. We took a dirt ledge on the north side of the ridge to circumvent this obstacle. The ledge looked like it had a bootpath along it. We climbed slightly upward (Class 3 with ample trees for anchors) aiming for a depression in the face below a notch. We then climbed up the slabby depression (crux section, Class 4/5) then beared right to the notch. We continued climbing along the south side now past the next gendarme (Class 3). Options either over the top of the crest or on the south side are available. The crest is flat for about 60 yards until the final scramble to the top (Class 3). Heather and rock outcrops make up this last bit. Time: 2-3 hours to beginning of route + 1 or 2 hours to summit. Gain: 3,300 ft (all told).
A short scramble and one rappell saw us off the summit area. Sadly, there have been fatalities on the mountain and at least two memorial plaques attest to this. One of the fatalities was for a leader who fell while placing pro for students. Now I defer judgement on the legitimacy of bonding plaques to a mountain, but the oversized stainless steel memorial bolts affixed to the East Ridge are an eyesore. We descended Lundin's East Ridge to the Red Mountain Trail and took the PCT back to the trailhead (car shuttle recommended to retrieve vehicle parked at pullout near chalets). Instead of taking the PCT to the Red Mountain Trail, I recommend taking the "abandoned" Commonwealth Creek Trail. I've been on this trail at least twice and it's not as abandoned as the sign would have you believe. Certainly, if doing a traverse over Lundin from Cave Ridge one should take the abandoned trail back to the car.
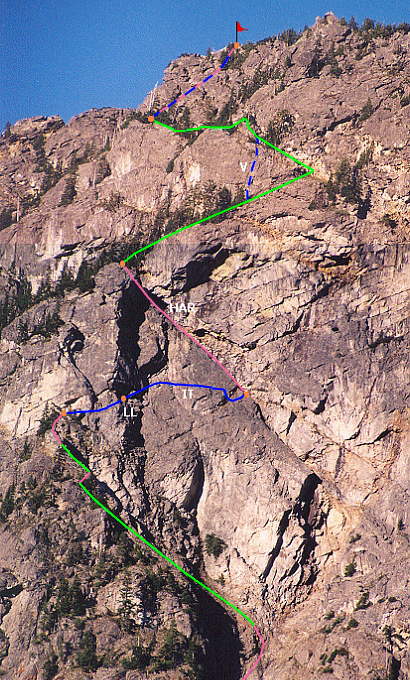
*In corresponding photo: Green = Class 3, Pink = Class 4, Blue = Class 5, Orange = belays, Red Flag = summit (LL = Lunch Ledge, IT = Improbable Traverse pitch, HAR = High-angle ramp, V = 5.7 variation pitch).
Click here to view photos.
![]()


